5-Minute Makeup Routine for the Time-Crunched Mom
5-Minute Makeup Routine for the Time-Crunched Mom
Hook
You know that moment. It’s 7:12 AM. You’ve already wiped a smear of yogurt off your blazer, located one missing sneaker under the couch, and negotiated a peace treaty over whose turn it is to pick the podcast on the school drop-off. You glance in the mirror and realize you have exactly five minutes—if you’re lucky—to make your face look like you’ve had eight hours of sleep and a full night of self-care.
I’ve been there. More times than I can count. And here’s the thing: you don’t need a 12-step routine to look put-together. You need a quick makeup routine that actually works for your life—one that survives a 9 AM meeting, a toddler’s enthusiastic hug, and a 3 PM coffee run.
Let me show you exactly what I do when I’m racing the clock but still want to feel like a human being.
H1: 5-Minute Makeup Routine for the Time-Crunched Mom
What I Wish I Knew (before I wasted years on complicated routines):
I wish someone had told me that consistency matters more than complexity. When I was a new mom, I’d try to squeeze in a full face—foundation, concealer, contour, highlight, brows, eyeshadow, liner, mascara, blush, lipstick—and I’d end up stressed, late, and washing half of it off in tears because it didn’t look right. Newsflash: babies don’t care about your highlight, and neither does your boss. What they do notice is how you show up. And showing up with clean, fresh skin and a smile? That’s the real glow.
Also, I learned the hard way that “long-wear” doesn’t mean “toddler-proof.” My first attempt at a quick routine involved a drugstore mascara that promised 24-hour wear. It lasted exactly 47 minutes before my daughter’s sticky fingers smeared it into a raccoon situation. Now, I choose products that can survive a hug, a sneeze, and a nap on the floor of the playroom.
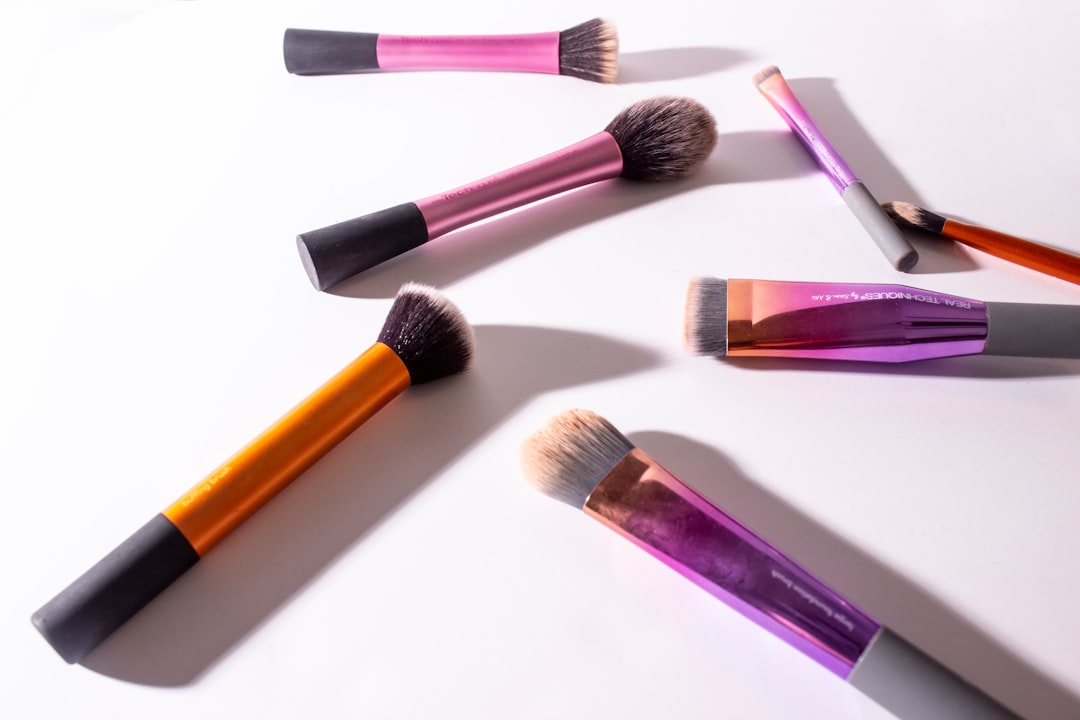
H2: Step 1 – The 60-Second Base That Actually Stays Put
The Quick Win: A tinted moisturizer with SPF. This is your cheat code.
Here’s the thing: foundation takes time. It needs blending, setting, and touch-ups. But a tinted moisturizer? You can slap it on in 30 seconds with your fingers, and it evens out your skin without looking like you’re wearing a mask. I use one from a drugstore brand that costs under $10. It’s light, it’s dewy, and it doesn’t settle into fine lines (because, yes, we have those now).
My story: Last week, I had a 7:30 AM dentist appointment followed by back-to-back calls. I did my base in 45 seconds—literally just dotting it on and blending outward. By 3 PM, my skin still looked fresh, and I hadn’t touched it once. That’s the kind of morning routine for working moms I can get behind.
Pro tip: Choose a shade that’s one step lighter than your natural skin tone. It brightens without looking cakey. And if you’re worried about coverage, you can layer it in the T-zone.
H2: Step 2 – The 90-Second Eye That Opens Up Your Face
What I Wish I Knew: You don’t need eyeshadow. You need definition.
I used to spend five minutes on eyeshadow alone—blending, layering, praying it didn’t look like a bruise. Now? I skip it entirely. Here’s my 90-second eye routine:
- Curl lashes (15 seconds): This opens your eyes instantly. No mascara needed yet.
- Tightline with a brown pencil (30 seconds): Run it along your upper lash line. Brown is softer than black and won’t look harsh if you’re tired. It makes lashes look thicker without the drama.
- One coat of waterproof mascara (45 seconds): I use a drugstore tubing mascara—it comes off with warm water, not tears. No raccoon eyes, no smudging.
Real example: I did this eye routine before a school event where I knew I’d be chasing my kid around the playground. Two hours later, my eyes still looked wide and awake, even after a face full of wind and a juice box incident.
The trick: Keep your mascara wand clean. If it gets clumpy, toss it. A fresh tube makes all the difference.
H2: Step 3 – The 60-Second Cheek That Fakes a Good Night’s Sleep
The Quick Win: A cream blush in a peachy-pink shade. It does double duty as lip color.
Cream blush is magic. It melts into your skin, looks natural, and takes zero skill to apply. I swipe it on the apples of my cheeks, blend upward toward my temples, and then dab a little on my lips. In 60 seconds, I look like I’ve had a full night’s sleep and a glass of water (even if I’ve had neither).
My story: One morning, I woke up with a cold and a 6 AM conference call. I did my base and blush, skipped everything else, and my coworker actually said, “You look great today!” I told her I was running on fumes, and she laughed. That’s the power of a good blush—it tricks everyone, including you.
Pro tip: If you’re oily, set your blush with a translucent powder. If you’re dry, just leave it. And don’t forget to blend into your hairline—no harsh lines, please.
H2: Step 4 – The 60-Second Brow That Frames Everything
What I Wish I Knew: Brows are the unsung heroes of a quick makeup routine.
I used to ignore my brows entirely. Then I realized that filling them in—even just a little—made my whole face look more polished. Here’s my speed hack:
- Use a tinted brow gel (drugstore, under $8). It adds color, holds hairs in place, and takes 30 seconds.
- Brush upward and outward, following your natural arch.
- Done. No pencils, no powders, no anxiety.
Real example: I was rushing to a doctor’s appointment and only had time for brows and mascara. I walked in feeling half-done, but my friend said, “You look so put together!” Brows do that. They’re the frame for your face.
The secret: If you have sparse brows, add a few quick strokes with a pencil after the gel. But honestly? Most days, the gel is enough.
H2: Step 5 – The 30-Second Lip That Lasts
The Quick Win: A tinted lip balm with SPF. Hydration + color + protection in one swipe.
Full-on lipstick? Not for a 5-minute routine. It bleeds, it smudges, and it requires mirrors. Tinted balm? You can apply it in the car, on the go, or while holding a toddler. I use one in a “my lips but better” shade—a sheer rose that works with everything.
My story: I once applied a bold red lip before a work event. My son sneezed on me, and it smeared across my chin. Never again. Now, I stick to balms that are forgiving and easy.
Pro tip: Keep one in your purse, one in your car, and one in your desk. You’ll never be without.
FAQ Section
Q: Can I really do this routine in 5 minutes? A: Yes, once you practice. The first time might take 8-10 minutes while you figure out placement, but after a week, you’ll be under 5. I time myself with my phone’s timer—it’s oddly satisfying.
Q: What if I have acne or dark spots? Do I need foundation? A: Not at all. Use a concealer stick (drugstore, $5-8) for spots. Dot it on, blend with your finger, and set with powder. The tinted moisturizer will do the rest.
Q: How do I make my makeup last through daycare pickup and dinner? A: Two words: setting spray. A quick spritz after your routine locks everything in. Look for one with a natural finish, not a matte one (matte can look dry).
Q: What’s the best drugstore brand for a quick routine? A: I love e.l.f., Maybelline, and NYX for this. They have great tinted moisturizers, brow gels, and cream blushes. No need to spend $40 on a single product.
Your Turn: 3 Action Items
-
Pick one product to try this week. Start with the tinted moisturizer or the cream blush. See how it feels. You don’t have to do the whole routine at once.
-
Set a timer for 5 minutes tomorrow morning. Do your routine. If you go over, that’s okay. Progress, not perfection.
-
Share your win. Text a friend or comment below: “I did my makeup in 5 minutes today and it actually looked good!” You deserve that small victory.
You’ve got this. Now go conquer your day—with or without a full face.
Tags
Related Articles
5-Minute Evening Skincare Routine for Tired Moms Who Just Want Bed
A realistic, quick evening skincare routine for working moms who are exhausted but still want glowing skin. No 10-step nonsense.
5-Minute Evening Skincare Routine for Exhausted Working Moms
A realistic, quick skincare routine for tired moms who want glowing skin without spending hours. Simple steps for real results.
5 Anti-Aging Skincare Tips Every Busy Mom Needs
5 Anti-Aging Skincare Tips Every Busy Mom Needs