Pantry Organization: A Busy Mom's Guide to Meal Prep
Pantry Organization: A Busy Mom's Guide to Meal Prep

You know that moment. It’s 6:12 PM on a Tuesday. You’re standing in front of your pantry, one hand holding a half-empty box of pasta, the other gripping a jar of marinara that expired in 2024. The kids are asking for dinner, you’re still on a work call in your head, and the pantry looks like a tornado hit a supermarket. You’re not alone. A 2023 survey found that the average mom spends 10-15 minutes per meal just hunting for ingredients. That’s over an hour a week lost to pantry chaos. I’ve been there, and I’m here to tell you: pantry organization isn’t about Pinterest-perfect jars. It’s about getting dinner on the table without losing your mind.
H1: Pantry Organization: A Busy Mom's Guide to Meal Prep
H2: The Truth About “Perfect” Pantries (And Why You Should Aim for “Functional Enough”)
Let’s be real: that beautiful pantry you see on Instagram with matching glass jars and labeled everything? It’s staged. And it probably gets messed up the second someone actually cooks in it. I’ve tried the whole “decant everything into identical containers” thing, and honestly? It lasted about three days. The problem is, when you’re a working mom, you don’t have time to re-sort rice every weekend. So here’s my counter-intuitive tip: Don’t organize for aesthetics. Organize for speed.
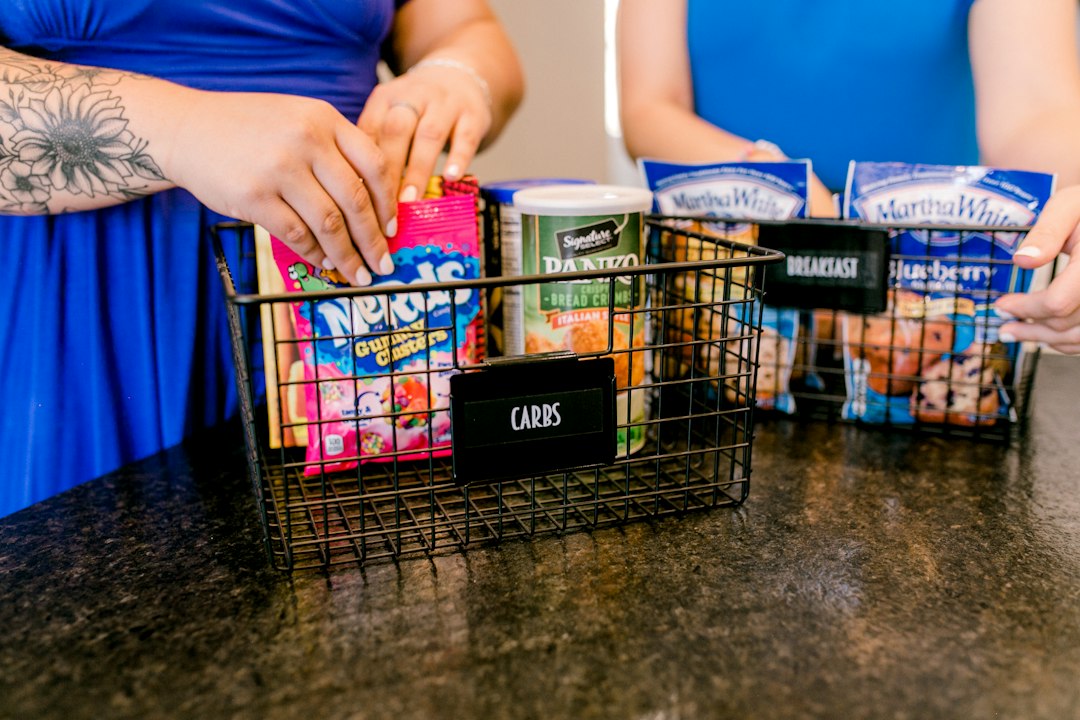
Instead of decanting everything, keep things in their original packaging—but group them by meal type. For example, all taco ingredients (taco shells, seasoning packets, canned beans, salsa) go in one bin. Pasta night gets its own bin: pasta boxes, jarred sauce, canned tomatoes, and a bag of frozen meatballs. This way, when you’re tired and hungry, you grab a bin and you’re done. It’s not pretty, but it works. And honestly, who’s judging your pantry at 6 PM on a Wednesday? No one.
Common mistake to avoid: Buying a million containers before you know what you actually need. Start with what you have (shoeboxes, old takeout containers, even zip-top bags) and upgrade later if you want. The goal is less decision fatigue, not more.
Quick Win: Take 10 minutes right now. Grab a marker and a stack of sticky notes. Label one shelf “Breakfast,” another “Lunch/Snacks,” and another “Dinner.” Move the most-used items to eye level. Done. You’ll save 5 minutes tomorrow morning.
H2: Meal Planning for Busy Moms: How Your Pantry Actually Helps (Or Hurts)
Meal planning for busy moms sounds like a great idea—until you’re staring at a recipe that calls for “one tablespoon of harissa paste” and you don’t even know what that is. Here’s the thing: your pantry should dictate your meal plan, not the other way around. If you’ve got a bag of lentils, a can of coconut milk, and some frozen spinach, guess what? You’re having lentil curry this week. Don’t buy a bunch of random ingredients for a recipe you found on TikTok. That’s how you end up with a pantry full of half-used jars and a guilty conscience.
Instead, do a weekly “pantry audit” every Sunday. It takes 5 minutes. Look at what you have (cans, boxes, jars) and build 2-3 meals around those items. Then buy only the fresh stuff you need. This approach has saved me from buying duplicates of canned beans at least 20 times. And it’s the backbone of real pantry organization—because a pantry that’s actually used stays organized.
Counter-intuitive tip: Don’t organize by food type (canned goods, grains, etc.). Organize by frequency of use. The stuff you use daily (coffee, oatmeal, snacks) goes on the middle shelf. Weekly items (pasta, rice) go on the shelf above. Monthly or emergency items (holiday baking supplies, bulk rice) go on the top or bottom. This way, you’re not bending or reaching for the most-used items. It’s ergonomic and practical.
Quick Win: Next time you buy groceries, spend 2 minutes grouping them by shelf before putting them away. You’ll naturally start to see patterns in what you use most.
H2: The 10-Minute Cleaning Routine That Keeps Your Pantry from Becoming a Black Hole
Let’s talk about the cleaning routine that actually sticks. I don’t do a deep pantry clean every month. I don’t have the energy or the time. What I do is a “reset” every time I finish a bag of something. Here’s how it works: when I empty a bag of flour, I wipe down that shelf. When I finish a jar of pickles, I toss it and check the shelf for crumbs. This takes 30 seconds. Over a month, you’ve cleaned every shelf without a dedicated “pantry cleaning day.” It’s like brushing your teeth—small, consistent actions prevent big problems.
Common mistake: Waiting until the pantry is a disaster to clean it. That’s like waiting until your car is out of gas to fill it up. You end up overwhelmed and avoid it longer. Instead, build cleaning into your shopping routine. When you come home with groceries, take 2 minutes to wipe down the shelf where you’ll put the new stuff. It’s that simple.
Another pro tip: Use shelf liners. Not because they’re cute (though they can be), but because they make cleaning a breeze. Spilled rice? Just pull out the liner and shake it into the trash. No scrubbing. I bought a roll of non-slip liner from the dollar store two years ago, and it’s still going strong.
Quick Win: Grab a damp cloth and wipe the handle of your pantry door right now. You touch it 10 times a day. A clean handle makes the whole pantry feel cleaner.
H2: Decluttering Tips That Actually Save You Money (And Time)
Decluttering tips usually sound like “toss everything you haven’t used in a year.” But for a working mom, that’s not always practical. What if you only use that can of pumpkin puree once a year for Thanksgiving? You’re not going to toss it. Instead, use the “one in, one out” rule for pantry items. Every time you buy a new jar of something (pasta sauce, peanut butter, pickles), move the oldest jar to the front. This prevents you from having three half-used jars of the same thing. It’s a simple habit that takes 5 seconds.
Counter-intuitive tip: Don’t declutter by category (grains, canned goods, etc.). Declutter by expiration date. Pull everything out that expires in the next 3 months. Put it in a “use soon” bin on the counter or a visible shelf. This forces you to use it before it goes bad. I’ve saved hundreds of dollars this way—no more throwing away expired food. Plus, it frees up space in your pantry for the stuff you actually use.
Common mistake: Buying in bulk to save money, then letting it expire. I’ve done this with bags of rice and cans of beans. Now, I only buy bulk items that I use at least once a week. Rice? Yes. Canned artichokes? No. Be honest with yourself about what you’ll actually use.
Quick Win: Set a timer for 5 minutes. Grab a trash bag and toss anything in your pantry that’s expired or that you know you won’t eat (that bag of kale chips from 2023? Gone). You’ll be shocked at how much space you free up.
H2: The “Emergency Meal” Shelf: Your New Best Friend
Every working mom needs a backup plan. That’s why I dedicate the lowest shelf in my pantry to “emergency meals.” These are meals that require zero fresh ingredients and can be made in under 20 minutes. Think: canned soup and crackers, boxed mac and cheese with canned tuna, or instant ramen with frozen veggies. When you’ve had a rough day, you don’t want to think. You want to open a can and eat. Having a designated shelf for these items means you never have to dig through a chaotic pantry when you’re hangry.
Pro tip: Keep a list of 3 emergency meals taped to the inside of your pantry door. That way, you don’t even have to decide—you just look at the list and grab what you need. For me, it’s: 1) Black bean soup (canned black beans + canned tomatoes + cumin), 2) Tuna casserole (canned tuna + boxed pasta + cream of mushroom soup), 3) Bean and cheese quesadillas (canned refried beans + tortillas + shredded cheese). All made from shelf-stable items.
Quick Win: Go into your pantry right now and pull out 3 shelf-stable items that can make a meal. Put them together in one spot. Congratulations—you just created your first emergency meal kit.
H2: How to Get Your Kids Involved (Without Losing Your Mind)
I’m not going to pretend that my kids love organizing the pantry. They don’t. But I’ve found a way to make it work without tears (mine or theirs). I give each kid a “job” that takes 2 minutes. My 7-year-old is in charge of checking expiration dates. My 5-year-old is in charge of putting snacks in their designated bin. It’s not perfect—sometimes I find a granola bar in the pasta bin—but it teaches them where things go, and it saves me time. Plus, when they help put away groceries, they’re more likely to eat what’s in the pantry.
Counter-intuitive tip: Don’t organize the pantry alone. Involve your kids in the process, even if it’s messy. The goal isn’t a perfect pantry; it’s a functional one that everyone can use. If your kid puts the cereal on the wrong shelf, that’s fine. You can fix it later. The important thing is that they’re learning.
Common mistake: Expecting perfection from kids. They’re not going to organize by color or category. Let them group things by “stuff I like” and “stuff I don’t like.” It’s not perfect, but it’s a start.
Quick Win: Next time you buy snacks, let your kid put them away. Give them one shelf or bin that’s “theirs.” They’ll feel ownership, and you’ll have one less thing to do.
FAQ
Q: How often should I organize my pantry? A: Honestly, I do a quick reset every time I buy groceries (2 minutes to wipe shelves and group items). A deeper clean happens every 3 months, but it’s not a big deal. The key is not to let it get so bad that you dread opening the door.
Q: What’s the best way to store bulk items like rice and flour? A: If you use them frequently, keep them in their original bags inside a larger bin. If you don’t use them often (like once a month), transfer to an airtight container to keep pests out. But don’t feel pressured to buy fancy containers—a zip-top bag works fine.
Q: How do I keep my pantry from getting cluttered with half-used bags? A: Use chip clips or binder clips to seal bags. Then put them in a “partial bag” bin. Once a week, check that bin and use up the small amounts first. This prevents you from having 5 half-used bags of the same thing.
Q: My pantry is really small. Any tips? A: Use vertical space! Add a tension rod for hanging spray bottles or bags of chips. Use over-the-door organizers for spices or small jars. And don’t be afraid to store less-used items in a plastic bin in the garage or under the bed. Your pantry should only hold what you use weekly.
Your Turn:
- Take 5 minutes to pull out one shelf and wipe it down. That’s it. You’re done for today.
- Create one emergency meal kit from shelf-stable items. Tape the recipe to your pantry door.
- Ask your kid to put away one bag of groceries this week. Let them choose where it goes.
- Set a reminder for next Sunday to do a 2-minute pantry audit.
You don’t need a perfect pantry. You need a pantry that works for you. Start small, celebrate the wins, and remember: a messy pantry doesn’t make you a bad mom. It makes you a mom who’s busy doing more important things. Now go grab a snack—you’ve earned it.
Tags
Related Articles
Pantry Organization Hacks for Busy Moms: 2026 Edition
Discover practical pantry organization hacks for busy moms. Save time, reduce stress, and keep your kitchen running smoothly with these simple tips.

Cozy Home Office Nook on a Budget: Working Mom's Guide
Create a cozy home office nook on a budget with these practical tips for working moms. Transform any small space into a functional, inviting workspace.
Quick Meal Prep for Busy Weeknights: 7 Real-Life Tips for Working Moms
Tired of the 6 p.m. scramble? These quick meal prep ideas for busy weeknights help working moms get dinner on the table without the stress.