7 Quick Pantry Organization Hacks for Busy Moms
7 Quick Pantry Organization Hacks for Busy Moms

Hook: The Spaghetti-O’s Incident
It was 6:47 PM on a Tuesday. I had just walked in the door from work, my toddler was clinging to my leg like a tiny, screaming barnacle, and I needed to make dinner now. I swung open the pantry door, ready to grab a box of pasta—only to be met by an avalanche of half-eaten bags of goldfish crackers, a rogue can of pumpkin puree from Thanksgiving 2024, and three identical jars of capers I forgot I owned. Dinner was not happening quickly. Dinner was a disaster.
Sound familiar? You’re not alone. A 2025 study found that the average family wastes 32% of their groceries, often because they simply can’t find what they need. When you’re a working mom, the pantry isn’t just a storage space—it’s the command center for your sanity. And if it’s a mess? That chaos trickles into every meal, every school lunch, every “Mom, I’m hungry!” meltdown.
But here’s the good news: You don’t need a Pinterest-perfect pantry. You need a functional one. One that works with your schedule, your kids, and your limited energy. I’ve been there, cried over spilled quinoa, and finally figured out what actually sticks. Let’s get into it.
H1: 7 Quick Pantry Organization Hacks for Busy Moms
H2: 1. The “Snack Station” Strategy (That Actually Stays Tidy)
The Mistake: Most moms try to organize snacks by type—all crackers together, all fruit pouches together. Sounds logical, right? But here’s the problem: Kids don’t care about categories. They just want the goldfish. And when you have to dig through a bin of granola bars to find the one box of fish crackers, the whole system breaks down.
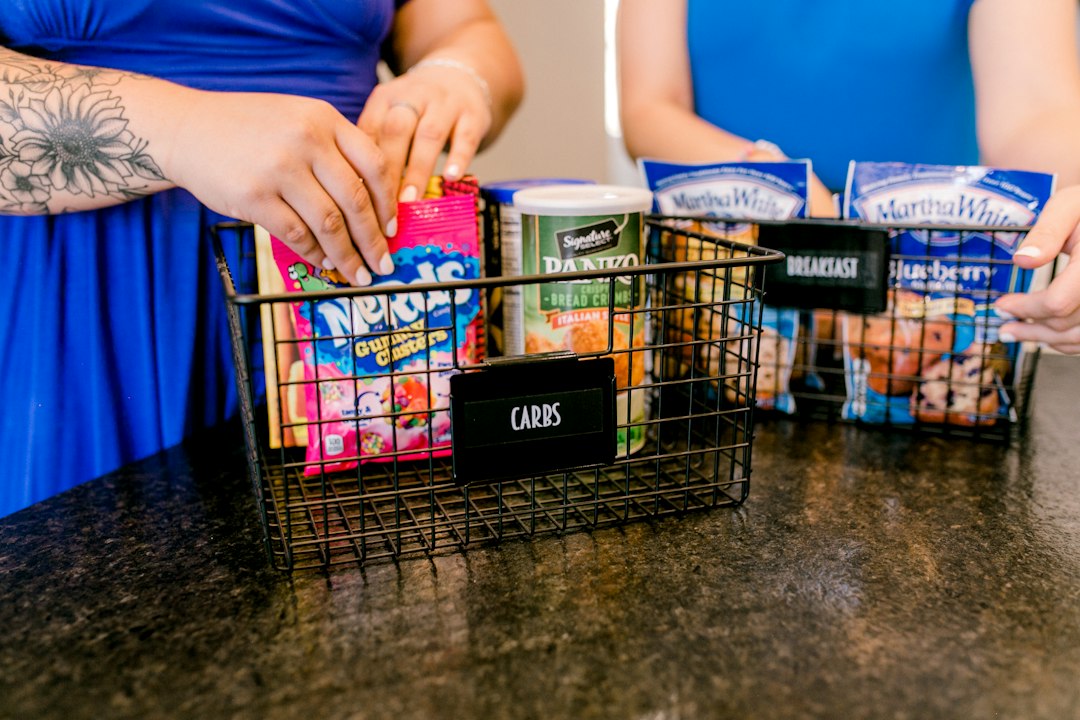
The Hack: Create a designated “Snack Station” on a low shelf or in a clear bin. This is the only place kids can grab snacks from without your help. Stock it with pre-portioned bags (I use reusable silicone pouches) of crackers, dried fruit, and cheese sticks. The key? One-in, one-out rule. When a new box of granola bars comes in, an old one goes to the snack station or gets donated. This prevents the “snack hoarding” that inevitably leads to stale crackers and guilt.
Counter-Intuitive Tip: Don’t organize snacks by “healthy” vs. “treat.” That just creates a power struggle. Instead, put everything in the snack station and let your kid choose. You control the portions (pre-bagging), not the choices. It’s a game-changer for toddler independence and your own mental load.
What I Wish I Knew: I used to think I needed to label every single bin. But labels are useless if your kid can’t read yet. Use pictures! I printed out simple icons (a cracker, a fruit, a cheese stick) and taped them to the bins. My 3-year-old now “shops” her own snack station, and I save 10 minutes a day.
H2: 2. The “Meal Prep Zone” That Saves You 20 Minutes a Day
The Mistake: You buy ingredients for a week of meals, but they get buried behind a bag of flour. Then you’re scrambling at 5 PM, wondering where the black beans went.
The Hack: Dedicate one shelf (or clear bin) to your meal planning for busy moms needs. Every Sunday, after I plan my dinners, I pull out only the ingredients I need for Monday through Friday. I put them in a single, labeled bin called “This Week’s Meals.” No digging. No “Where’s the canned tomatoes?” panic.
Real-Life Example: Last week, I was making sheet pan fajitas. I grabbed the “This Week’s Meals” bin, and everything was there: bell peppers, onions, black beans, tortillas, and seasoning. Dinner took 15 minutes. The kids helped by dumping the beans into a bowl (messy, but worth it).
Bonus: This also helps with cleaning routine. When you know exactly what’s in your meal prep zone, you’re less likely to buy duplicates. I used to buy three jars of pasta sauce because I couldn’t find the first one. Now? I check the bin first.
H2: 3. The “Vertical Storage” Hack for Cans and Jars
The Mistake: Stacking cans on top of each other. You know what happens: you need one can of corn, and suddenly you’re playing Jenga with 12 cans of diced tomatoes.
The Hack: Use a can rack or tiered shelf to store cans vertically. This is a classic home organization trick, but here’s the twist: Don’t just use it for cans. Use it for jars of pasta sauce, broth, and even spice jars. When everything is visible, you can see at a glance what you have. No more “I thought we had tomato paste” moments.
Counter-Intuitive Tip: Don’t organize cans by type (all beans together, all vegetables together). Instead, organize by meal. Put black beans, corn, and diced tomatoes together because they’re taco night. Put chickpeas, tahini, and lemon juice together for hummus. This makes meal planning for busy moms a breeze—you grab the “taco shelf” and you’re done.
What I Wish I Knew: I spent $30 on a fancy can rack. Turns out, a simple wire shelf from the dollar store works just as well. Don’t overthink it. Function over form.
H2: 4. The “Bulk Bin” Method (No, Not the Grocery Store Kind)
The Mistake: Buying bulk items (rice, flour, oats) and leaving them in the original packaging. Those bags rip, spill, and take up weird shapes that don’t stack.
The Hack: Transfer bulk items into clear, airtight containers. But here’s the key: Label them with the expiration date AND a recipe idea. For example, on my container of rolled oats, I wrote “Oatmeal (exp. 2027)” and “Use for: overnight oats, granola bars.” That way, when I’m in a rush, I don’t just see oats—I see possibilities.
Real-Life Example: My daughter loves “breakfast cookies” (basically oatmeal with banana and chocolate chips). Having the oats in a clear container with that note means she can grab it herself (with a little help). It turns pantry organization into a teaching moment.
Bonus: This also reduces food waste. When you can see your oats, you’re more likely to use them. I went from throwing away half a bag of flour every six months to using every last cup.
H2: 5. The “Kid-Friendly” Shelf (That Actually Works)
The Mistake: Putting kid-friendly items on high shelves “to keep them safe.” But then you’re constantly getting asked to reach things. Or worse, they climb the shelves.
The Hack: Create a low shelf (or bottom drawer) that’s only for items your kids can access independently. Think: reusable water bottles, small plates, snack bags, and pre-portioned snacks. The rule is: If it’s on this shelf, they can use it without asking. If it’s above, they need help.
Counter-Intuitive Tip: Don’t put anything breakable or messy on this shelf. I learned the hard way after my son “helped” by pouring a bag of flour onto the floor. Stick to sturdy, kid-safe items. And yes, you’ll have to re-stock it daily. But the trade-off is worth it: your kids learn independence, and you save your voice from saying “Mom, can I have…?” 50 times a day.
What I Wish I Knew: I used to think “kid-friendly” meant plastic containers. But my toddler actually prefers using small glass jars (with my supervision). They’re easier for her to grip, and she feels like a “big kid.” Just make sure they’re unbreakable or use silicone sleeves.
H2: 6. The “One-Touch” Rule for Pantry Maintenance
The Mistake: Trying to deep-clean your pantry once a month. It never happens. Or if it does, it takes two hours and you’re exhausted.
The Hack: Implement the “One-Touch” rule: Every time you open the pantry, do one small thing. Put away one item that’s out of place. Wipe one spill. Throw away one expired can. It takes 30 seconds, but over a week, it keeps your pantry from becoming a disaster zone.
Real-Life Example: I keep a small trash bag in the pantry (hooked on the inside of the door). Every time I grab a snack, I scan for expired items. Last week, I found a can of pumpkin puree from 2023. Into the trash it went. No guilt, no ceremony.
Bonus: This works for cleaning routine too. Pair it with your nightly kitchen tidy-up. While the kids are brushing their teeth, spend 60 seconds straightening the pantry. It’s not perfect, but it’s functional.
H2: 7. The “Emergency Shelf” (For Days When Cooking Is Not Happening)
The Mistake: Having no backup plan for chaos days. You know the ones: sick kid, late meeting, or just “I can’t even” energy.
The Hack: Dedicate one shelf (or bin) to “Emergency Meals.” These are shelf-stable items that require zero prep: canned soup, boxed mac and cheese, microwave rice pouches, and protein bars. The rule: You can only use this shelf when you’re truly desperate. No guilt. No “I should have meal-prepped.” Just survival.
Counter-Intuitive Tip: Don’t stock this shelf with “healthy” options if that’s not realistic. If your emergency meal is a can of Spaghetti-O’s? Fine. The goal is to reduce stress, not to win a nutrition award. On those days, fed is best.
What I Wish I Knew: I used to feel guilty about having “junk food” in the house. But having an emergency shelf actually prevents me from ordering takeout (which is more expensive and less healthy). It’s a lifeline, not a failure.
FAQ: Pantry Organization for Busy Moms
Q: How often should I deep-clean my pantry? A: Aim for once a season (every 3 months). But honestly? The “One-Touch” rule (Hack #6) will keep it clean enough. Deep-clean when you notice expired items piling up or when you can’t find anything.
Q: My kids are messy. How do I keep the pantry organized with them “helping”? A: Embrace the mess. Let them “help” by putting away snacks (even if they’re upside down). Focus on the system, not the perfection. The snack station (Hack #1) is your best friend—it contains the chaos.
Q: What’s the best way to store spices? A: Use a tiered spice rack or a magnetic strip on the wall. But for busy moms? Keep your most-used spices (salt, pepper, garlic powder, cumin) in a small bin on the counter. The rest can live in the pantry. Don’t organize by alphabet—organize by how often you use them.
Q: How do I stop buying duplicates? A: Use clear containers and label everything. Before you shop, take a photo of your pantry shelves. It takes 10 seconds and saves you from buying that third jar of capers.
Your Turn: 3 Action Items for This Week
-
Pick one hack (start with the Snack Station or the Meal Prep Zone) and implement it this weekend. Don’t try all seven at once—you’ll burn out.
-
Set a 5-minute timer every evening to straighten your pantry. That’s it. Just 5 minutes. You’ll be amazed at what you can do.
-
Celebrate progress, not perfection. If your pantry is 20% less chaotic than it was last week? That’s a win. You’re a working mom, not a professional organizer. Give yourself grace.
Now go forth and find that can of black beans. You’ve got this.
Tags
Related Articles
Pantry Organization Hacks for Busy Moms: 2026 Edition
Discover practical pantry organization hacks for busy moms. Save time, reduce stress, and keep your kitchen running smoothly with these simple tips.

Cozy Home Office Nook on a Budget: Working Mom's Guide
Create a cozy home office nook on a budget with these practical tips for working moms. Transform any small space into a functional, inviting workspace.
Quick Meal Prep for Busy Weeknights: 7 Real-Life Tips for Working Moms
Tired of the 6 p.m. scramble? These quick meal prep ideas for busy weeknights help working moms get dinner on the table without the stress.